Free digital copy
Get Speciality Food magazine delivered to your inbox FREE
Get your free copy

It’s a competitive world out there. For your offering to stand out, you absolutely must have images that make people’s mouths water. Perhaps your marketing budget stretches to a few professional shots for big launches, but it simply isn’t practical to use a pro for the regular stream of photos you need to feed the hungry beast that is social media.
Great news. You are not biting off more than you can chew by doing your own food photography. Your phone camera is more than capable of producing stunning images – and so are you! Armed with these top tips for photographing food and products with your phone, you’ll soon be snapping shots that have ‘social sizzle’.
1. Tell a story
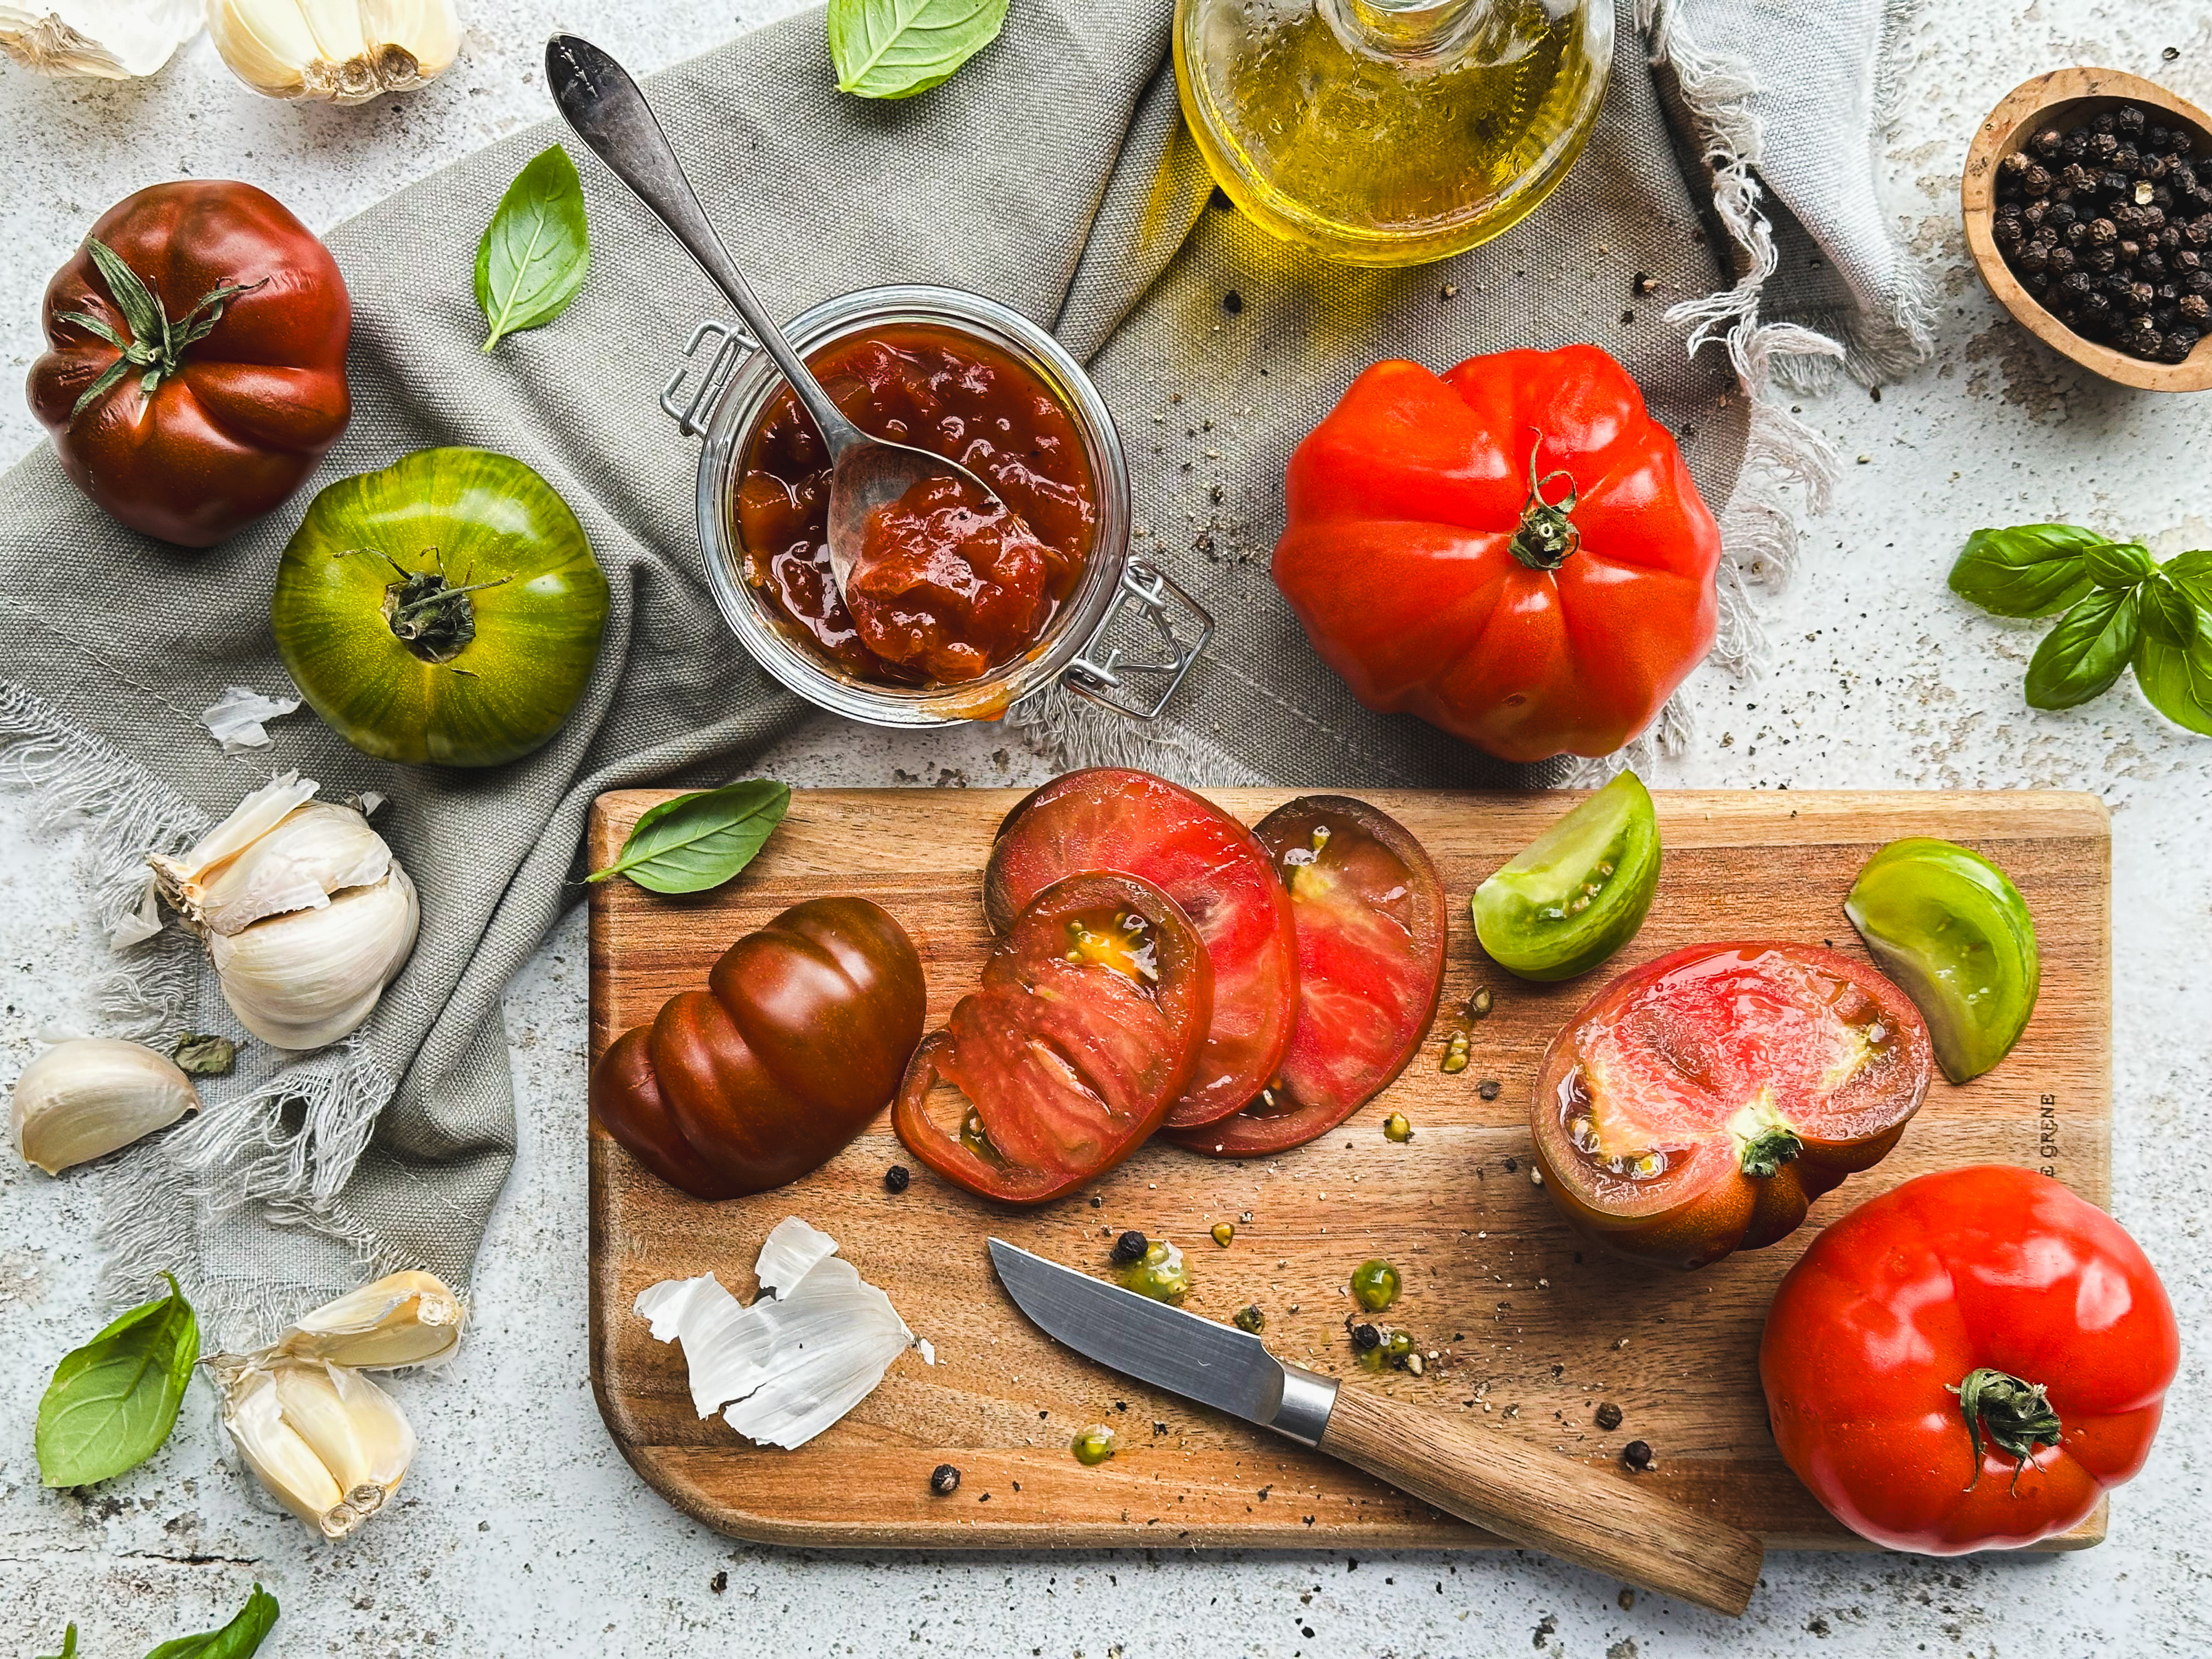
Before you even start setting up your shot, decide on a theme or simple story that will engage the viewer and get them to imagine themselves preparing or eating the food. It can be a very simple story such as a tomato being prepared, which suggests a tasty chutney is being freshly made with juicy tomatoes.
2. Invest in backdrops
Use photography backdrops to help tell the story. This way, it doesn’t matter if you don’t happen to have a rustic farmhouse table or distressed metal surface. You can create the look using wipe clean, vinyl backdrops.
3. Keep it simple
It’s very easy to get carried away with lovely props and lose sight of the fact that the food should be the hero of the shot, and everything else is simply the supporting act. Remember that less is often more.
4. Use a tripod
The main reason for using a tripod isn’t to keep the phone steady, but to hold it in the same place while you arrange the items in your shot. You’ll discover that there can be a lot of faffing about with the food and props, and it makes it much easier if the phone is in a consistent position. You don’t need to spend a fortune on a tripod, just make sure it’s sturdy enough to hold the phone in place. As a lot of food photos are taken from above, it’s handy to get a tripod that also has a horizontal arm.
5. Have a dress rehearsal
If you’re photographing plates in your cafe or restaurant, start with empty dishes, before the food is even prepared, and play around with the position of them until you’re happy. Only then should you add the food, with the hot (or frozen) dishes at the last moment.
6. Use natural daylight
You can get beautiful results using natural light. You just need to set up the shot next to a window, but out of direct sunlight. Position yourself to the left or right of the window, so that the food is lit from the side. Sidelight shows off textures and also creates gentle shadows.
7. Don’t just point and shoot
Your phone camera will automatically do the work for you if you point it at the subject and press the shutter button. But did you know you can take control of the focusing by first tapping on the subject on the screen? You can also adjust the brightness with the sunshine symbol that appears when you tap to focus (on some phones, it may be a different symbol). Doing it this way makes sure the shot is in focus in the right place and the brightness is exactly how you’d like it to be.
This is just the tip of the iceberg when it comes to the clever stuff your phone can do and it’s worthwhile finding out what other tricks it has up its sleeve. When I get a new phone, I search for a YouTube video on how to use it. Focus on how the standard Photo and Portrait modes work, as they’re the ones you’ll use for food photography. You can change the amount of background blur in photos even after you have taken them.
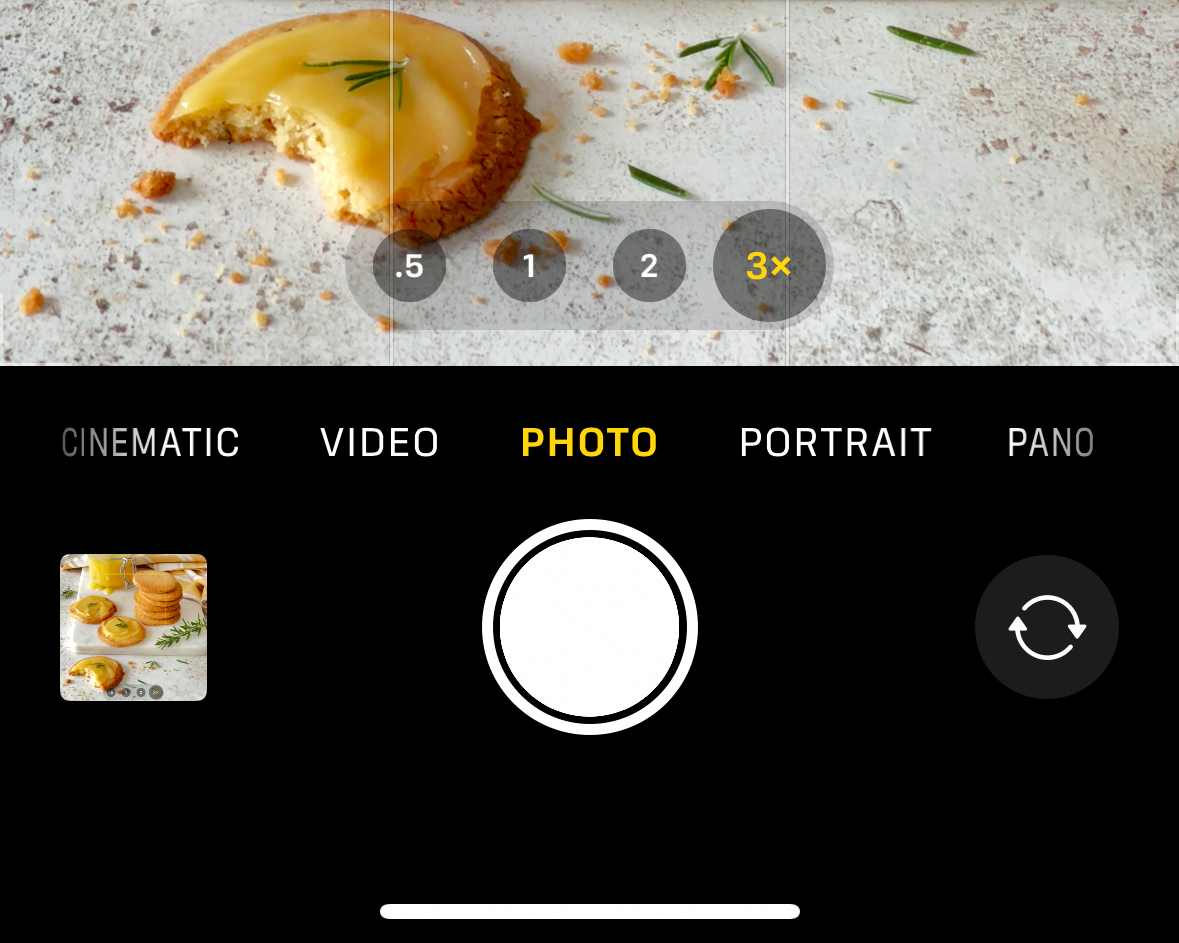
8. Get closer to your subject with optical zoom
Whatever brand of phone you use, the most important feature you need is sufficient optical zoom. Optical zoom uses the actual lenses to get closer, whereas digital zoom just enlarges the pixels, resulting in poorer quality. For food photography, you ideally need 3x optical zoom (older phones may only have 0.5x and 1x and these lenses distort closer subjects such as food). To find out how much optical zoom capability your phone has, look up the make and model online.
Did you know that you shouldn’t pinch out to zoom? Pinching out to zoom risks using poorer-quality digital zoom. To stick to optical zoom, tap the numbers you see at the bottom of the screen when you open the camera.
9. Choose the best angle
Taller subjects such as burgers and long drinks should be shot from a low angle – even at eye level, to show off the layers. Use Portrait mode and 3x zoom for these images. Blur the background but don’t overdo it. If you have a product in the shot, position it next to the food rather than behind it to ensure that any labels are in focus.
Flatter dishes such as pizzas, salads, pasta etc. can be shot from directly overhead or at a high angle. Use backlight by facing towards the window, to allow the natural light to show the shine on sauces and glossy food. Use normal Photo mode for overhead shots.
10. Always edit
Editing is the icing on the cake and simply must not be skipped. A few tweaks using the editing tools on your phone can make all the difference. Check to see if a crop can improve the composition, and make small adjustments to things such as contrast, texture, vibrance and sharpness.
Restaurant orders go up by as much as 65% when establishments use menu descriptions and photos (Grubhub), and another study showed that customers will spend around 13% more on a well-photographed dish.
The inference is clear. Food retails at higher prices and sells in larger quantities when marketed with good-quality imagery – something you can achieve yourself with time, practice and your trusty phone camera.